At Tier-1 it's now possible to use Jupyter notebooks served by JupyterHub. The service is reachable via browser at the following page: https://jupyterhub-t1.cr.cnaf.infn.it/
Once you get there, you will be asked to login by using your account bastion credentials. The account must belong to an experiment which has pledged CPU resources on the batch system.
Moreover, right after the login it is also possible to customize the jupyter environment following the instructions at the User environment customization paragraph.
When you login, the Hub service submits a local HTCondor job which is named jupyter-<username>. You can check its status from your user interface as a local job submitted on the sn-02, with the following command:
-bash-4.2$ condor_q -name sn-02


-- Schedd: sn-02.cr.cnaf.infn.it : <131.154.192.42:9618?... @ 01/13/22 17:50:38
OWNER           BATCH_NAME                 SUBMITTED   DONE   RUN    IDLE  TOTAL JOB_IDS
dlattanzioauger jupyter-dlattanzioauger   1/13 17:47      _      1      _      1 1035919.0

Total for query: 1 jobs; 0 completed, 0 removed, 0 idle, 1 running, 0 held, 0 suspended
Total for dlattanzioauger: 1 jobs; 0 completed, 0 removed, 0 idle, 1 running, 0 held, 0 suspended
Total for all users: 25632 jobs; 12551 completed, 0 removed, 10796 idle, 2174 running, 111 held, 0 suspended
As long as the notebook is running, you will also see your job in RUN status. The service runs on a farm worker node.
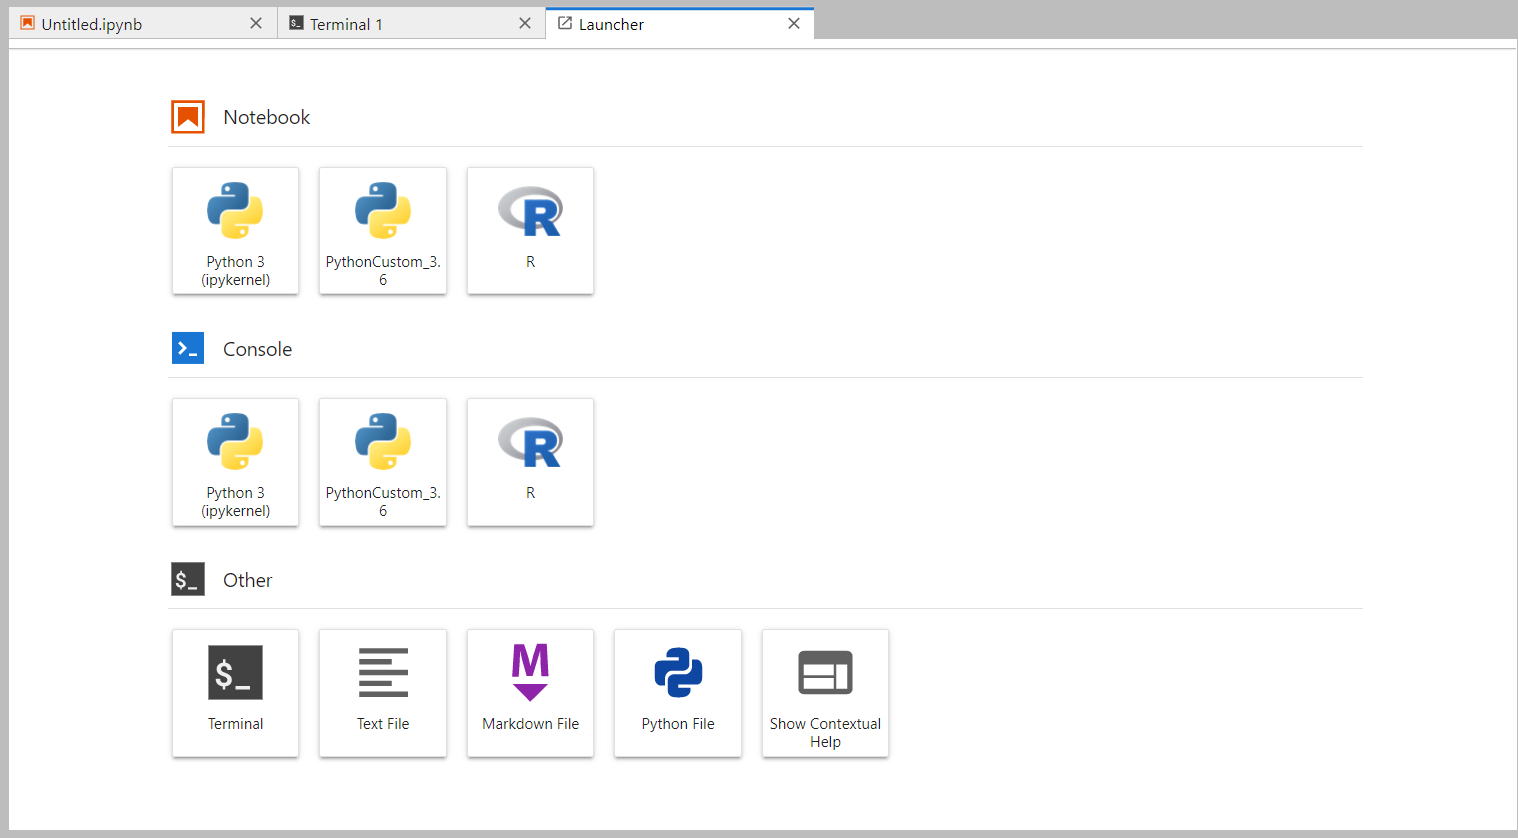
Here's the Home page that you will see after the job went running:
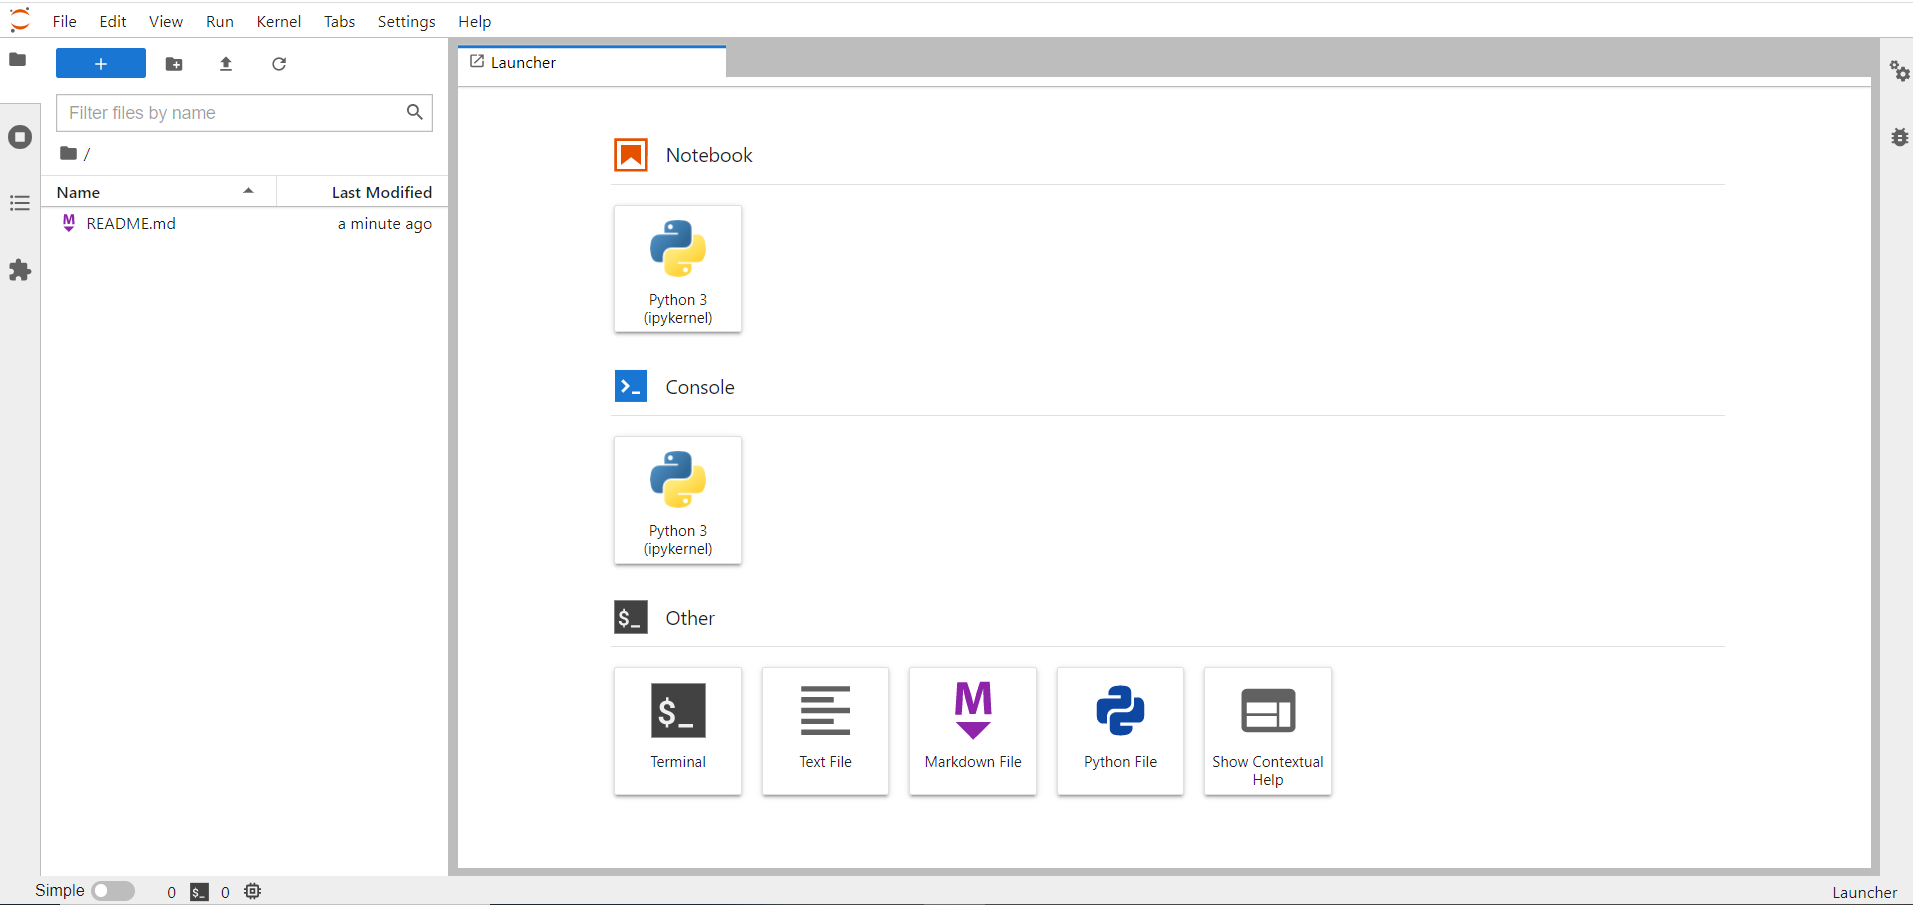
From this page, it is possible to browse through the different tools, for instance you can open a new Python notebook or a bash shell:
Inside the file "README.md" on the left column, you will find some useful informations and a link to this user guide.
It is important to know that the work done here and all the data produced (e.g. if you run a python code by your notebook from this web page) are treated as a local job, so they follow the same rules valid for all the local jobs. This means that the jobs will have a limited lifetime, will use the pledged CPU resources and their status can be checked by the usual condor_q command.
The output files produced by a job must be copied somewhere else, otherwise, if they are saved only locally on the wn, they will be lost once the job is done. Posix access to /cvmfs, /storage and /opt/exp_software is guaranteed.
When you logout from the service or if you close the browser, the notebook keeps running, so after a new login it still will be there if the job lifetime is not expired. On the other hand, you can also decide to stop the notebook, in this case at the next login a new job is automatically submitted. There are two ways to stop the notebook:
1) From the upper-left corner, select the menu File > Hub Control Panel and then click on the "Stop My Server" red button.
2) The second way is removing the job by using the usual HTCondor command used for local jobs. For instance, run from the ui:
$ condor_rm -name sn-02 -cons 'JobBatchName=="jupyter-dlattanzioauger"'
All jobs matching constraint (JobBatchName=="jupyter-dlattanzioauger") have been marked for removal
Check that job has been succesfully removed:
-bash-4.2$ condor_q -name sn-02


-- Schedd: sn-02.cr.cnaf.infn.it : <131.154.192.42:9618?... @ 01/13/22 18:44:25
OWNER BATCH_NAME      SUBMITTED   DONE   RUN    IDLE   HOLD  TOTAL JOB_IDS

Total for query: 0 jobs; 0 completed, 0 removed, 0 idle, 0 running, 0 held, 0 suspended
Total for dlattanzioauger: 0 jobs; 0 completed, 0 removed, 0 idle, 0 running, 0 held, 0 suspended
Total for all users: 31480 jobs; 13169 completed, 0 removed, 15852 idle, 2352 running, 107 held, 0 suspended
File persistency and quota
There are three distinct levels of file persistency:
- scratch directory: all data contained in this folder are to be considered absolutely ephemeral. This means that all files that are left in this directory will be destroyed at the end of this job. A quota of less 2TB is shared among all notebooks running on the same worker node.
- home directory (~/): all data contained in this folder are kept between subsequent notebook runs unless unused for more than 1 month. If no activity is detected after this time limit, all data may be wiped out. This storage is intended for notebook files and installation of small packages via pip. A hard quota is set to 512MB.
- /storage/gpfs_* directories: these are the usual CNAF disk folders, shared with user interfaces and worker nodes. Quotas are applied on a per-experiment basis and persistency is completely demanded to the experiment.
User environment customization
If a user needs to customize the owner environment, it has to explain the content of a python configuration file in the specific window at the login web page.
For example, in order to load the CVMFS path the user should explain the right instructions as in the picture below.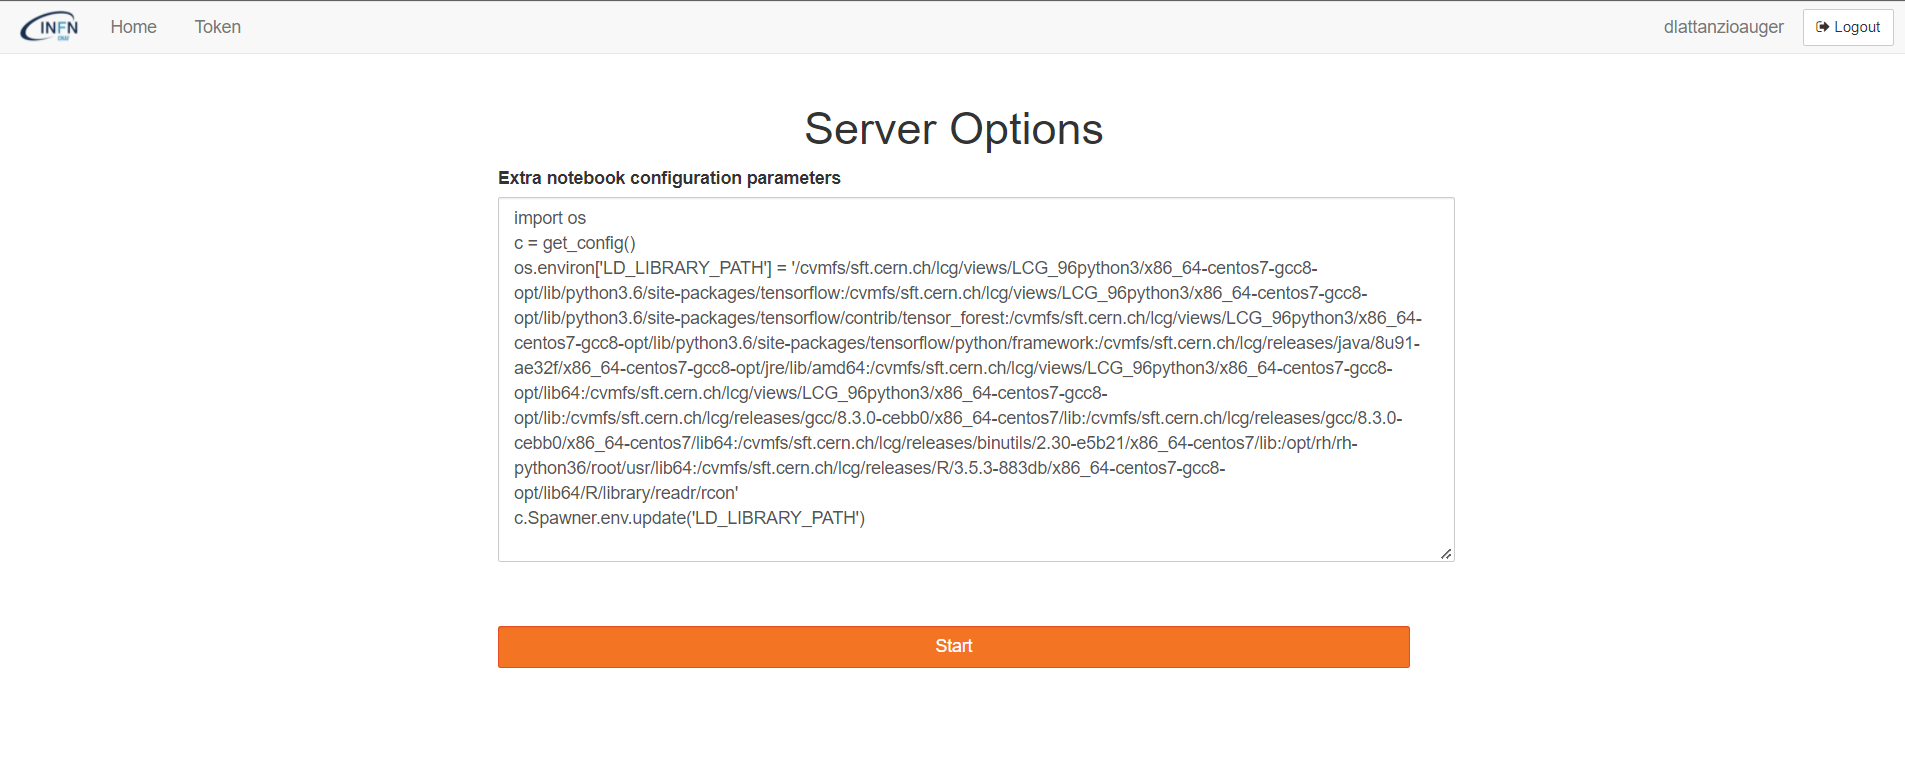
Indeed, in this case the LD_LIBRARY_PATH is properly loaded inside of the jupyter notebook.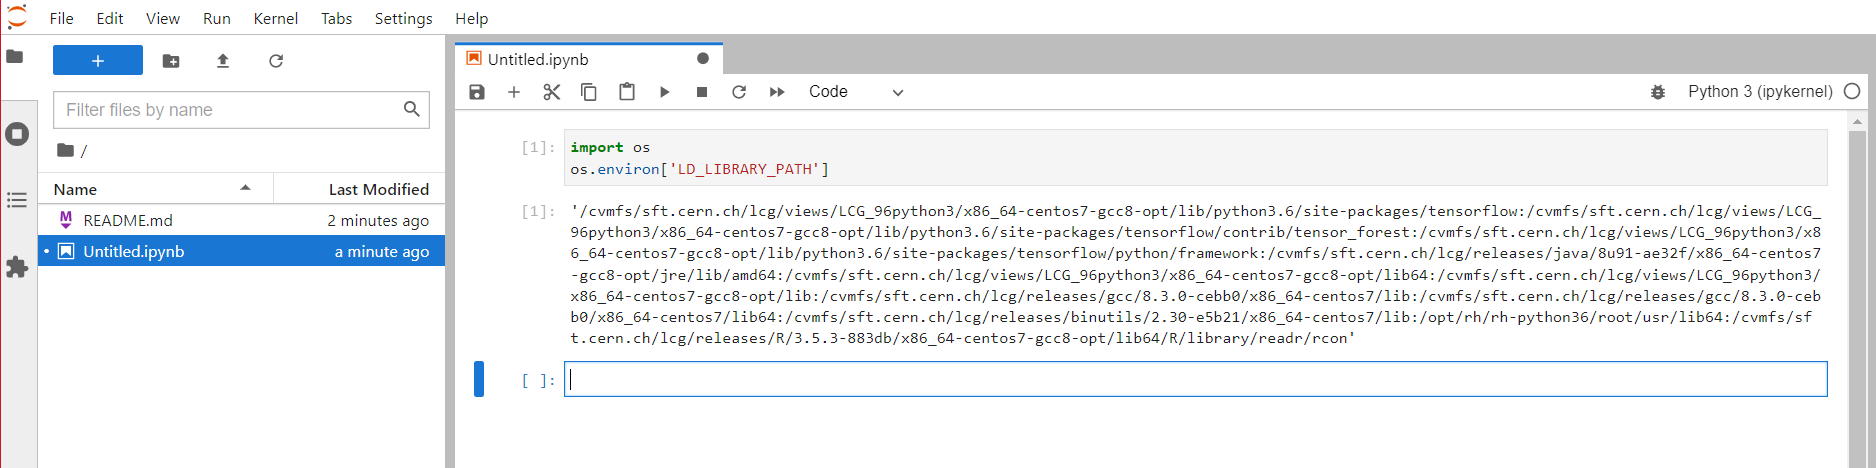
N.B. This procedure cannot work if the jupyter notebook is already running.
Conda environment creation
During the Jupyter notebook excecution, it is possible to create a Conda environment by installing different packages like another Python version. For instance, you can issue the following commands:
%conda create -n test -y python=3.6

%conda run -n test pip install ipykernel

%conda run -n test python -m ipykernel install --user --name python3.6 --display-name PythonCustom_3.6
N.B. If you had previously the jupyter environment, before launching the above commands, you need to import again the proper environment variable:
import os
os.environ['LD_LIBRARY_PATH']=''
At this point, you will see a new shortcut to a new notebook which contains the new PythonCustom_3.6 conda environment.

For example, inside this new notebook, you can launch the ROOT software:
import sys
sys.path.append('/cvmfs/sft.cern.ch/lcg/views/LCG_96python3/x86_64-centos7-gcc8-opt/lib/python3.6/site-packages/')
sys.path.append('/cvmfs/sft.cern.ch/lcg/views/LCG_96python3/x86_64-centos7-gcc8-opt/lib')
import ROOT
Welcome to JupyROOT 6.18/00
Software installation in a Conda environment
After having issued a proper conda environment, the user has to activate it in order to use it from the CLI:
Singularity> conda activate test
N.B. In order to avoid the following error:
Singularity> conda activate test
/usr/bin/python3: symbol lookup error: /usr/bin/python3: undefined symbol: _Py_LegacyLocaleDetected
Singularity>
The user needs to unset the LD_LIBRARY_PATH environment variable:
Singularity> unset LD_LIBRARY_PATH
Singularity> conda activate test
(test) Singularity>
At this point, it is possible for example to install a software like R:
(test) Singularity> conda install R
and then it can be executed:
(test) Singularity> R

R version 3.6.1 (2019-07-05) -- "Action of the Toes"
Copyright (C) 2019 The R Foundation for Statistical Computing
Platform: x86_64-conda_cos6-linux-gnu (64-bit)

R is free software and comes with ABSOLUTELY NO WARRANTY.
You are welcome to redistribute it under certain conditions.
Type 'license()' or 'licence()' for distribution details.

R is a collaborative project with many contributors.
Type 'contributors()' for more information and
'citation()' on how to cite R or R packages in publications.

Type 'demo()' for some demos, 'help()' for on-line help, or
'help.start()' for an HTML browser interface to help.
Type 'q()' to quit R.

>
After the R installation, the user can install the native R kernel for Jupyter:
> install.packages('IRkernel')
During the installation, the user will be prompted with a list of different countries. For a quicker installation, the nearest can be chosen.
At this point, running the following command, a new R shortcut will be available on the main Jupyter dashboard:
IRkernel::installspec()